
Rapid Prototyping & Low-Volume Manufacturing Guide
For product designers and engineers, the journey from a digital concept to a physical product can be complex. Choosing the right manufacturing strategy is critical. This guide provides a comprehensive overview of rapid prototyping and low-volume manufacturing. It explains how these processes accelerate product development and reduce costs.
This information is backed by years of experience in the manufacturing sector. Our team has helped countless clients bring their innovations to market. This guide draws on that expertise to offer clear, actionable insights. We have seen firsthand what works and what does not. This shared knowledge will help you make informed decisions.
What is Rapid Prototyping?
Rapid prototyping is a group of techniques used to quickly manufacture a scale model of a physical part or assembly. It is an essential step in the product development cycle. The goal is to test a design before committing to large-scale production. This process helps engineers identify flaws and improve functionality. It allows for quick design iterations. Prototypes are often used for form, fit, and function testing. They can also be used for visual and marketing purposes.
Key benefits of rapid prototyping:
- Accelerated Development: Prototypes can be created in days, not weeks.
- Cost Reduction: Design errors are caught early, avoiding expensive retooling.
- Improved Communication: Physical models help stakeholders visualize the final product.
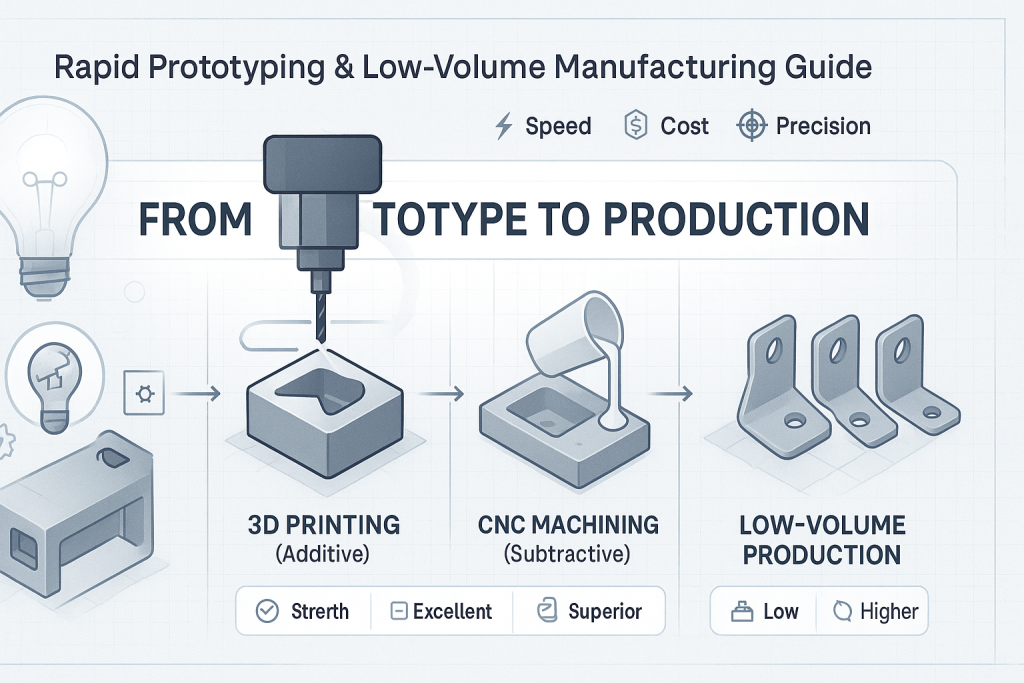
Common rapid prototyping technologies include 3D printing (Additive Manufacturing), CNC machining, and vacuum casting. Each method serves a specific purpose. For example, 3D printing is great for complex shapes. CNC machining is ideal for high-precision parts with tight tolerances. Vacuum casting is perfect for creating functional prototypes from a master model.
The Role of CNC Machining in Prototyping
CNC machining is a subtractive manufacturing process. It uses computerized controls to remove material from a block. This creates the desired part geometry. It is widely used for rapid prototyping because of its precision and material versatility. CNC machines can work with plastics, metals, and composites. They produce parts with excellent surface finishes and dimensional accuracy.
Our own experience with CNC machining confirms its value. We have used it to create functional prototypes for a wide range of industries. From aerospace to consumer electronics, its applications are vast. This technology allows us to test designs under real-world conditions. It helps ensure the final product will perform as expected.
If you are considering CNC machining for your prototype, it is important to understand the costs. We have a dedicated tool to help. Our CNC Machining Cost Calculator provides a quick and accurate estimate.
From Prototype to Low-Volume Manufacturing
Once a prototype is perfected, the next step is often low-volume manufacturing. This process bridges the gap between prototyping and mass production. It involves producing a small batch of finished products, typically from 1 to 1,000 units. It is a cost-effective solution for startups, custom product lines, and specialized industries.
Low-volume manufacturing allows companies to:
- Enter the Market Quickly: Get products to customers without the delay of mass production.
- Manage Inventory: Avoid holding large amounts of stock.
- Test Market Demand: Gauge customer interest before a major investment.
Methods for low-volume production include CNC machining, urethane casting, injection molding, and sheet metal fabrication. The choice of method depends on the material, part complexity, and required volume. For example, urethane casting is an excellent option for producing dozens of parts. It uses a silicone mold from a master model. For metal parts, CNC machining remains a top choice. It offers unmatched precision for small batches.
Advanced CNC Machining: 5-Axis vs 3-Axis
When using CNC machining for prototyping or low-volume production, the type of machine is important. The two most common types are 3-axis and 5-axis machines. A 3-axis CNC machine moves along the X, Y, and Z axes. It is a workhorse for many jobs. It is ideal for parts with simple geometry and for milling from a single side.
However, complex parts often require more freedom. This is where a 5-axis CNC machine shines. A 5-axis machine can move along all three linear axes plus two rotational axes. This allows the cutting tool to approach a part from virtually any angle. It can create complex contours and undercuts in a single setup. This reduces the need for multiple setups and improves accuracy.
Our expertise includes both types of machining. We have seen firsthand how a 5-axis machine can handle intricate designs that are impossible with a 3-axis machine. To better understand their differences and applications, you can read our detailed comparison: 5-Axis vs 3-Axis CNC Machining.
Material Selection in CNC Machining
Choosing the right material is a crucial part of the process. It impacts a part's strength, weight, and cost. Aluminum alloys are very popular for prototyping and manufacturing. They offer an excellent balance of properties. Two of the most common aluminum alloys are 6061 and 7075.
6061 aluminum is known for its versatility. It is easily machined and welded. It has good corrosion resistance. This makes it a great general-purpose alloy for many applications. 7075 aluminum is a high-strength alloy. It is often called a "super-strength" aluminum. It is commonly used in aerospace and high-performance components.
The choice between them depends on the application's needs. For a part that requires high strength, 7075 is the better choice. For a more general-purpose part where machinability is key, 6061 is often preferred. To learn more about their specific properties and applications, we have a detailed guide on this topic: 6061 vs 7075 CNC.
Rapid Prototyping Decision Table
| Criteria | 3D Printing | CNC Machining | Urethane Casting | Sheet Metal Fabrication |
| Part Complexity | Very high (Intricate geometries, internal features) | Medium to High (Complex shapes, tight tolerances) | Medium (Duplicates from a master model) | Low to Medium (Box-like shapes, simple bends) |
| Material Options | Wide range of plastics & some metals (e.g., PLA, ABS, Nylon, Inconel) | Very wide range (Plastics, aluminum, steel, brass, titanium) | Limited (Polyurethane resins mimic plastics) | Limited (Steel, aluminum, copper, brass) |
| Part Strength | Low to Medium (Varies by material and process) | High (Often stronger than 3D printed parts) | Medium (Mimics injection molded parts) | High (Excellent for strong, lightweight parts) |
| Surface Finish | Rough (Requires post-processing) | Excellent (Can be polished or textured) | Good (Mirror-like to textured) | Good (Clean, uniform finish) |
| Cost | Low (For single, complex parts) | High (Depends on material and complexity) | Low (For medium-volume batches) | Medium (Depends on material and part size) |
| Lead Time | Very Fast (Hours to days) | Fast (Days to a week) | Medium (1-2 weeks for mold and parts) | Fast (Days to a week) |
| Best Use Case | Conceptual models, complex prototypes | Functional prototypes, low-volume parts | Functional prototypes, end-use parts (1-100 units) | Enclosures, brackets, chassis |
Process Flowchart: From Idea to Product
This flowchart outlines the typical steps in a rapid prototyping and low-volume manufacturing project.
- Idea/Concept: A designer or engineer has a new product idea.
- CAD Design: The idea is translated into a 3D digital model using Computer-Aided Design (CAD) software. This is the blueprint for the part.
- Prototyping Method Selection: Based on the part's purpose, complexity, and material, a prototyping method is chosen (e.g., 3D printing for a visual model, CNC for a functional part).
- Prototype Creation: The first physical part is made. This is the rapid prototyping stage.
- Testing & Evaluation: The prototype is tested for form, fit, and function. Feedback is gathered from stakeholders.
- Design Iteration: Based on the test results, the CAD model is refined and improved.
- Low-Volume Manufacturing Method Selection: Once the design is finalized, a method for producing a small batch is selected (e.g., CNC machining for metal parts, urethane casting for plastic).
- Production: A small batch of parts is manufactured. This is the low-volume manufacturing stage.
- Quality Control: Each part is inspected to ensure it meets the design specifications.
- Delivery: The finished parts are shipped to the client.
FAQ: Common Questions
Q1: What is the main difference between rapid prototyping and low-volume manufacturing?
Rapid prototyping is about creating a single, functional model to test a design. Low-volume manufacturing is about producing a small batch of end-use parts for a specific need.
Q2: Which method is best for a quick, cheap prototype?
3D printing is often the fastest and most affordable option for creating a visual or non-functional prototype. It's excellent for complex shapes.
Q3: When should I choose CNC machining over 3D printing?
Choose CNC machining when you need a prototype made from a specific material (like metal), require very tight tolerances, or need a part with superior strength and a smooth finish.