
What 3D Metal Printing Prototyping Can Validate Early: Tolerance Guide 2026
3D Metal Printing Prototyping is changing the way engineering teams prove out fit, function, and manufacturability before they spend a dollar on tooling. Instead of waiting weeks for fixtures or molds, you can build metal parts straight from CAD and get hard data in days. This guide distills what our engineers at GD Prototyping have learned on real programs, so you can set the right expectations for 2026 and get reliable validation early.
What you'll learn here:
• How to translate drawing tolerances into realistic, as-printed expectations
• What to check in the prototype stage versus what to reserve for post-processing
• How part orientation influences distortion, surface texture, and hole behavior
• Where to leave machining stock to meet tight GD&T on key faces and bores
• Which alloys and post-treatments balance accuracy, strength, and lead time
How GD Prototyping Accelerates Your Loop
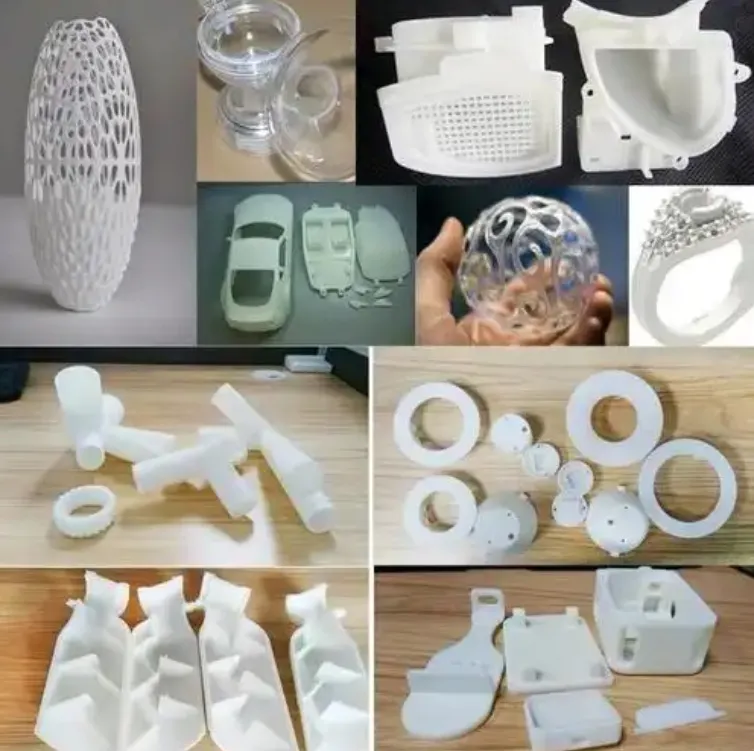
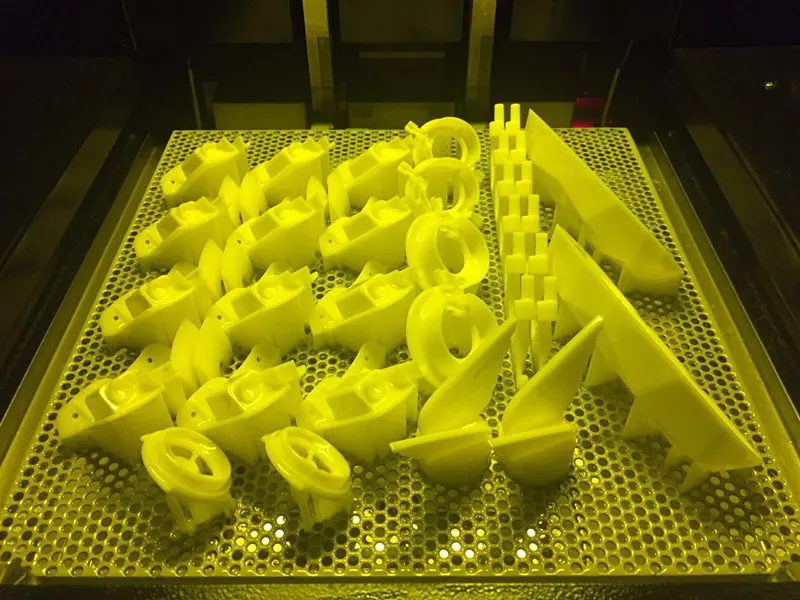
We build metal parts layer by layer using DMLS/SLM, which lets you iterate complex geometry without tooling. You can print assemblies, test ergonomics, and confirm interfaces early, then lock down the design with confidence. Our shop also runs SLA, SLS, and FDM, so hybrid prototypes are straightforward: metal where you need load paths or heat resistance, polymers where you want appearance, grip, or light weight. With 3D Metal Printing Prototyping at the core, you get faster validation, fewer redesign spins, and lower risk before production gates.
Early Evidence That De-Risks Decisions
The biggest value of 3D Metal Printing Prototyping is proof under realistic conditions. A first metal build tells you which features can stay as-printed, which need machining, and how the part behaves in the environment that matters.
What we recommend validating on the first pass:
• Dimensional fit: Check bosses, bores, slots, and mating faces against functional limits. Aim for "in-function" rather than chasing micron-level perfection at this stage.
• Functional performance: Exercise snap fits, brackets, housings, manifolds, and heat-exposed features at load and temperature. Confirm stiffness and thermal behavior.
• Assembly strategy: Trial printed subassemblies, inserts, threads, pins, and seals. Make sure fasteners locate cleanly and sealing features land where they should.
• Manufacturability: Evaluate support layouts, powder removal access, and orientation trade-offs. These choices drive tolerance and surface quality.
Teams that run this playbook often compress development by two to three weeks. There's no tooling to rework, and decisions move forward on data rather than assumptions.
A Practical Tolerance Snapshot for 2026
You need numbers you can plan around. Based on our production data and industry references, the ranges below are conservative, as-printed starting points for DMLS/SLM. They let you decide what to prove in 3D Metal Printing Prototyping and where to hold stock for finish machining.
• General dimensional accuracy: ±0.10 mm up to 100 mm length. Beyond 100 mm, expect roughly ±0.2% of nominal dimension.
• Holes: Small through-holes usually print undersized. For 2 - 10 mm holes that won't be machined, add +0.10 to +0.20 mm in CAD. For tight bores, leave 0.30 - 0.50 mm of machining allowance.
• Minimum features: Free-standing walls are stable at ≥0.8 - 1.0 mm thickness. Lattices and fine ribs should carry ≥0.4 - 0.6 mm struts, depending on alloy.
• Flatness before machining: Plan for 0.2 - 0.4 mm variation per 100 mm, influenced by orientation, support density, and heat input.
• Surface roughness (as-printed): Up-facing surfaces typically land around Ra 8 - 15 µm; down-facing surfaces around Ra 12 - 25 µm. Machine or lap sealing faces.
• Positional tolerances: Hole locations within ±0.10 - 0.20 mm are common without machining; datum-based finishing tightens these significantly.
• Density: >99.5% as-built is routine; HIP lifts density to >99.9% when fatigue life or leak-tightness is critical.
We keep these values conservative across AlSi10Mg, 316L, 17-4PH, and Ti-6Al-4V. Before a build, our team uses simulation and empirical scaling (typically 0.1 - 0.2% compensation) to fine-tune for the actual geometry.
Design Moves That Tighten Accuracy
Design has a large say in how tolerances fall. A few practical choices reduce variability without adding lead time:
• Orient for function: Point critical faces and holes upward or vertical. You'll see crisper edges and less dross. Avoid long down-facing spans that soak heat and warp flatness.
• Protect critical surfaces: Elevate important faces on sacrificial pads or reserve stock. As a rule of thumb, leave 0.30 - 0.50 mm on bores and 0.20 - 0.40 mm on sealing planes.
• Engineer holes and threads: Print pilot holes, then drill/ream to H7/H8. Threads M6 and larger often print acceptably for schedule-driven prototypes; for smaller threads, tap after stress relief to avoid brittleness.
• Manage heat: Add relief slots, ≥0.5 mm fillets, and smooth wall transitions to reduce distortion. For long or thin features, schedule stress relief before the part comes off the plate.
• Plan powder egress: Include escape holes of ≥2.0 - 3.0 mm and design internal channels with generous radii. It prevents trapped media and rough interiors later.
These choices show up in real metrics: better cylindricity, steadier clearances, and fewer scrap or rework loops in the second build.
From Prototype to Drawing-Spec
3D Metal Printing Prototyping gives you rapid proof. Post-processing gets you to the tight GD&T in the drawing.
• Thermal steps: Stress relief stabilizes geometry. HIP improves density and fatigue performance on parts that flex, vibrate, or seal under pressure.
• CNC finishing: On critical bores and faces, we routinely hold ±0.01 - 0.02 mm and deliver Ra ≤1.6 µm on sealing surfaces.
• Surface options: Bead blasting, polishing, and coatings elevate both function and appearance for demos and field tests.
• Metrology: CMM and 3D scanning verify flatness, true position, parallelism, and other GD&T callouts. You'll get reports tied to your datums.
Because SLA, SLS, FDM, and DMLS live under one roof here, hybrid builds are straightforward. Combine metal load-bearing skeletons with polymer housings to test ergonomics, appearance, and assembly fit while controlling cost.
Choosing Alloys and Treatments for Accuracy and Speed
Material and post-treatment choices matter for both schedule and performance.
• 316L: Forgiving to print, good corrosion resistance, stable for general-purpose prototypes. Surface finish is predictable; HIP only when fatigue or leak paths matter.
• 17-4PH: Higher strength; requires careful heat treatment to hit target properties. Good for brackets and fixtures that see load.
• AlSi10Mg: Light and fast to print. Expect more pronounced thermal behavior; design with generous fillets and uniform wall sections.
• Ti-6Al-4V: High specific strength and biocompatibility. Excellent for medical and aerospace parts where weight or heat resistance is key. Plan for HIP on fatigue-critical geometries.
Pair material selection with the right post-processing stack. If schedule is tight, print for function and finish only critical features. If the part will face cyclic loads or pressure, budget HIP and a tighter machining plan.
Where 3D Metal Printing Prototyping Moves the Needle
Teams across industries use our process to make progress earlier in the program:
• Automotive and aerospace: Lightweight brackets, mounts, and manifolds for vibration, thermal, and fit checks.
• Medical devices: Biocompatible fixtures, cutting guides, and trial implants for clinical evaluations.
• Industrial equipment: Jigs, grips, and end-effectors tuned to line trials and short runs.
• Consumer products: Market-ready samples with polished or textured finishes for stakeholder reviews and pilot marketing.
Typical timelines from clean CAD to metal parts are 2 - 5 days. After validation, short-run production follows quickly. Removing tooling shrinks upfront spend and lets you iterate until the drawing is stable.
- Practical Notes on Orientation and Holes
Orientation drives both dimensional outcome and surface quality. For example, a vertical bore tends to hold location better than a long horizontal bore that sits over supports. Small through-holes print tight - if you need a free flow path at 2 - 3 mm with no machining, add compensation in CAD and avoid down-facing exits that collect dross. For manifolds, design gentle transitions and powder escape routes, then plan a post-build flushing step to clear residual media.
A Straightforward Call to Action
If you want a clear read on tolerance risk before tooling, upload your CAD to GD Prototyping for a complimentary review. We'll suggest orientation, compensation, and post-processing paths aligned to your GD&T targets. Start with 3D Metal Printing Prototyping to verify the features that matter, then scale with confidence - on time, on budget, and on spec.